Mastering the Tracks: Automobilista 2 Tips
So, you’ve fired up Automobilista 2 and found yourself a bit overwhelmed by the sheer amount of options, cars, and tracks? Totally understandable. This simulation racer throw…
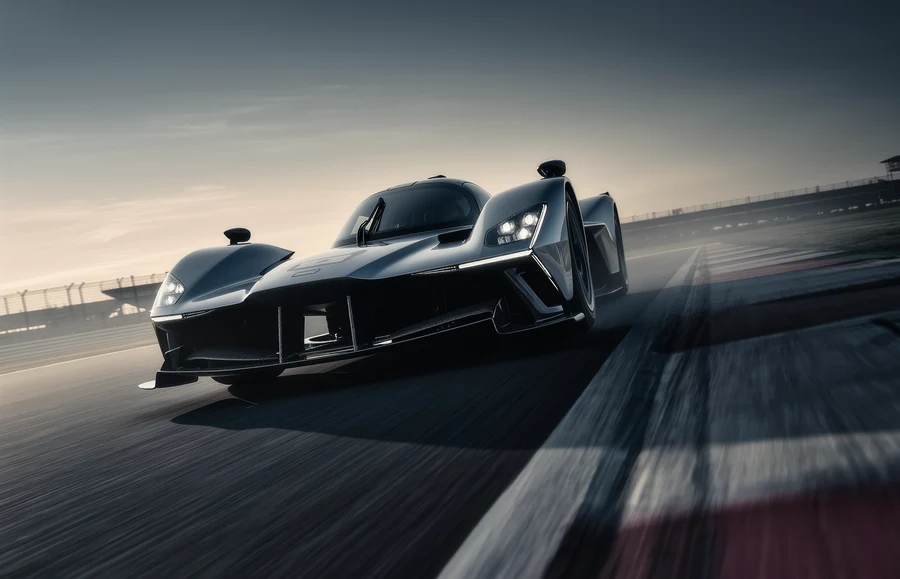
So, you’ve fired up Automobilista 2 and found yourself a bit overwhelmed by the sheer amount of options, cars, and tracks? Totally understandable. This simulation racer throws a lot at you, and while that’s part of its charm, it can also be a steep learning curve. The good news is, with a few key pointers, you can go from feeling lost to feeling like you’re actually driving those fantastic virtual machines. Let’s dive into some practical tips to help you master the tracks in Automobilista 2.
Before you even think about setting a blistering lap time, making sure your game is set up correctly for how you play is crucial. This isn’t about chasing the highest frame rate or the most realistic reflections; it’s about making the game feel responsive and controllable for you.
Force Feedback: Your Digital Steering Wheel’s Best Friend
This is probably the most important area to spend time on. Force feedback (FFB) is what tells your steering wheel what the car is doing on track, the grip, the bumps, the slide. Without it, you’re just guessing.
Understanding FFB Settings
Automobilista 2 has a lot of FFB options. Don’t just stick with the defaults.
- Gain: This is the overall strength of the FFB signal. Too high, and it’ll feel like you’re wrestling a wild animal. Too low, and you won’t feel anything. You want a level where you can feel the tire grip and the car’s behavior without your arms getting tired after a couple of laps.
- Low Force Cutoff (or Deadzone): This setting essentially ignores very light FFB signals. If your wheel has some internal friction or you have a very sensitive wheel, setting this too low might make the wheel feel a bit “sticky” or “gritty” even when you’re not doing much. Start with a small value and increase it if you feel unwanted forces.
- Damper: This simulates the resistance felt when turning the wheel quickly. A little damper can make the wheel feel more solid, but too much can make it sluggish and prevent you from reacting quickly.
- Tire Force: This is a big one. It directly relates FFB strength to the forces generated by your tires. Experiment with this, as different wheels and cars will respond differently.
- Road Effects/Surface Effects: These add vibrations and details from the track surface itself, rumble strips, bumps, and imperfections. This is great for immersion, but if it’s overwhelming, it can distract you from the core feedback about tire grip.
Finding Your Sweet Spot
The best way to dial in FFB is to go out on track with a car you like and just drive. Pay attention to what you feel through the wheel. Does it feel informative? Does it feel natural? Make small adjustments and do a lap or two to get a feel for the change. Some people prefer a very detailed, chatty wheel, while others like a simpler, more direct connection. Neither is necessarily right or wrong, it’s about what works for your driving style.
Controller vs. Wheel: Adapt Your Settings Accordingly
If you’re using a gamepad, the FFB settings are different, but the principle is the same: make it feel responsive.
Gamepad Adjustments
- Vibration Intensity: Control how strong the rumble is. Too much can be annoying.
- Steering Deadzone: Similar to the wheel’s Low Force Cutoff, this accounts for any looseness in your controller’s analog stick.
- Trigger Deadzone: For throttle and brake, ensure there’s no accidental input when you’re not touching them.
The goal for controllers is to have subtle feedback that gives you a sense of grip and oversteer/understeer without making the controls feel loose or overly sensitive.
Understanding Tire Models: The Art of Grip
Automobilista 2 is renowned for its detailed tire physics. This is where a lot of the realism comes from, and understanding how your tires work is key to driving fast and consistently.
The Tire Temperature Triangle
Tires in AMS2 generate heat, and this heat is crucial for optimal grip. There are three main temperature readings:
- Camber Temperature: This represents the temperature across the tire’s width, from the inner edge to the outer edge. Uneven camber temps often indicate setup issues (toe, camber, or spring rates).
- Pressure Temperature: This measures the overall temperature of the tire, reflecting how hard it’s working and how well it’s dissipating heat.
- Overall Temperature: This is a combination of the above and gives you a general idea of the tire’s operating window.
Ideal Temperature Ranges
Each tire compound has an ideal operating temperature range. You’ll usually find this information in the car setup screen or by looking up tire data for the specific car and compound. Generally, aim for temperatures within a 5-10 degree Celsius window of the optimal range.
- Too Cold: Tires won’t have full grip. They’ll feel slippery, and you’ll experience understeer or oversteer more easily.
- Too Hot: Tires lose grip, become greasy, and can overheat, leading to rapid wear and unpredictable behavior.
Tire Wear: A Factor in Longer Races
Tire wear isn’t just about longevity; it actually affects grip. As tires wear down, their temperature also tends to increase, and their ability to generate grip can diminish.
Managing Tire Wear and Temperature
- Driving Style: Aggressive acceleration, braking, and cornering will wear your tires faster and generate more heat. Smoother inputs are key for endurance.
- Setup Adjustments:
- Camber: Too much negative camber can overheat the inner part of the tire. Too little can overheat the outer edge.
- Toe: Toe-out can cause excessive tire scrub and heat.
- Tire Pressures: Higher pressures can sometimes lead to hotter tires if the tire is already working hard. Lower pressures can increase the contact patch, but also make the tire more susceptible to overheating if not managed.
- Track Surface: Some tracks are more abrasive than others and will wear tires down faster.
In longer races, a well-executed strategy that manages tire wear and temperatures will often beat pure speed from a driver who abuses their tires.
Mastering the Art of Braking and Acceleration
These two inputs are fundamental to racing, but in a sim like AMS2, they require a nuanced approach to achieve maximum performance.
Trail Braking: Carrying Speed Through Corners
Trail braking is the technique of gradually releasing the brakes as you turn into a corner. It sounds simple, but it’s incredibly effective.
How Trail Braking Works
- Weight Transfer: By keeping some brake pressure as you turn, you shift weight forward onto the front tires. This gives the front tires more grip, allowing you to turn more aggressively.
- Corner Entry Speed: Because the front tires have more grip, you can carry more speed into the corner, which directly translates to a faster exit.
- Smooth Transitions: The key is to gradually release the brake pressure. Abruptly letting off the brakes will cause the weight to shift back suddenly, potentially making the car unstable or causing understeer.
Practicing Trail Braking
- Find an easy corner first. A medium-speed sweep is a good place to start.
- Brake in a straight line as you normally would.
- As you initiate turn-in, begin to slowly ease off the brake pedal.
- Try to maintain as much corner entry speed as possible while still rotating the car.
- You should feel the front tires bite and help the car rotate.
- Gradually release the brake completely as you reach the apex or start to unwind the steering.
It takes practice to get the feel for the right amount of brake and the right timing. Look for telemetry data if you can, or just rely on the feel of the car.
Throttle Control: Beyond Just Hammering It
While full throttle is great down the straights, smooth throttle application is critical, especially on corner exit.
Avoiding Wheelspin
- Don’t Accelerate Too Early: If you get on the power too soon, before the car has straightened out, you’ll likely get wheelspin.
- Progressive Throttle: Gradually increase throttle pressure. Feel how the car responds. If you feel the rear tires starting to lose grip, back off slightly.
- Traction Control (TC): Many cars in AMS2 have TC. While it can be a lifesaver, relying on it too much can mask underlying issues with your throttle control and can sometimes be slower than a well-managed throttle pedal. If you’re serious about mastering the car, try driving without TC or with a lower setting and see if you can improve your lap times and consistency.
- Differential Settings: The car’s differential settings (if adjustable) play a huge role in how the car puts power down. More aggressive locking differentials can help, but can also make the car twitchy on corner exit. Smoother diffs are more forgiving.
Understanding Aerodynamics: The Ghostly Force
Aerodynamics is a massive part of racing, and in Automobilista 2, it’s modeled with a good degree of accuracy, especially for the downforce-generating cars.
Downforce: The Sticky Tire Effect
Downforce is the force that pushes the car down onto the track, effectively making the tires work harder and improving grip.
How Downforce Affects Performance
- Cornering Speed: Cars with more downforce can take corners at significantly higher speeds because the increased tire grip compensates for the centrifugal force.
- Straight Line Speed: The flip side is that downforce creates drag. This means cars with high downforce settings will be slower on the straights than cars with lower downforce, all else being equal.
- Stability: Downforce generally increases the stability of the car, making it feel more planted.
Adjusting Aerodynamics
Many cars in AMS2 allow you to adjust aerodynamic elements like front and rear wings, or diffusers.
Finding the Right Balance
- Track Dependent: The optimal aero setup depends heavily on the track. High-speed tracks with long straights and flowing corners benefit from less downforce for top speed. Tight, twisty tracks with many low-speed corners require more downforce for grip.
- Balancing Front and Rear: It’s not just about maximizing total downforce, but also about having the right balance between the front and rear of the car.
- Too much rear downforce: Can lead to understeer under acceleration and braking.
- Too much front downforce: Can lead to excessive understeer in corners and potentially instability under braking if the front tires lock up due to the extra load.
- Feel the Understeer/Oversteer: Pay attention to how the car behaves. If it tucks its nose in too much and refuses to turn (understeer), you might have too much front downforce or not enough rear. If the rear slides out when you turn (oversteer), you might have too much rear downforce or not enough front.
A good way to approach aero setup is to start with lower downforce settings and gradually increase them while testing. You’ll reach a point where adding more downforce doesn’t improve your lap time significantly, and may even hurt it due to drag.
Track Specific Racing Lines: More Than a Groove
While there’s often a “fastest” line around a track, it’s not always what you might initially think. Understanding why a certain line is fast is more important than just memorizing it.
The Apex: Not Always the Innermost Point
The apex is the point in a corner where the car is closest to the inside edge of the track. However, the “racing apex” is often slightly later than the geometric apex.
Why the Racing Apex Matters
- Corner Exit: By taking a slightly later, or “late apex,” you can straighten your wheel more when you apply full throttle. This allows for better traction and a faster exit onto the next straight.
- Maintaining Momentum: The goal is to minimize unnecessary steering inputs and braking, which bleed off speed. A well-chosen late apex allows you to carry more momentum through the corner.
- Carving Through the Corner: Think of it as tracing a smooth arc, not trying to hug the inside curb.
Track Conditions and Tire Performance
The track surface itself will influence your lines and how the car behaves.
Adapting to Conditions
- Rubbered-In Tracks: As more cars run on a track, tire rubber is deposited, creating a “cleaner” and usually faster racing line. You’ll feel more grip on this line.
- Bumps and Curbs: Some tracks have notorious bumps or aggressive curbing. You’ll need to learn which bumps to avoid and how to use the curbs to your advantage without upsetting the car. Some cars can “clip” curbs more aggressively than others.
- Wet Weather: In the rain, grip levels are drastically reduced. You’ll need to brake much earlier, be incredibly smooth with throttle and steering inputs, and often take a wider, slower line to avoid aquaplaning or spinning.
Finding the Fast Line: Practice and Observation
- Watch Replays: After a session, watch your own replays. See where you’re losing time. Are you braking too early? Too late? Not carrying enough speed through a certain section?
- Observe AI or Online Races: If you’re struggling, watch how faster AI drivers or experienced online racers tackle the track. Pay attention to their braking points, turn-in points, and throttle application.
- Experiment: Don’t be afraid to try slightly different lines within a corner. Sometimes a subtle change can make a big difference. Explore the full width of the track where it’s beneficial.
Mastering Automobilista 2 is a journey, not a destination. It’s about understanding the intricate dance between car, track, and driver. By focusing on these practical tips, you’ll find yourself not just playing the game, but truly racing it. Enjoy the process, and happy driving!
FAQs
What is Automobilista 2?
Automobilista 2 is a racing simulation game developed by Reiza Studios. It is the sequel to the original Automobilista and features a wide range of racing cars and tracks.What platforms is Automobilista 2 available on?
Automobilista 2 is available on Microsoft Windows PC platform. There are currently no plans for a console release.What features does Automobilista 2 offer?
Automobilista 2 offers a variety of features including realistic physics, dynamic track conditions, a wide range of cars and tracks, multiplayer support, and VR compatibility.Can players customize their cars in Automobilista 2?
Yes, players can customize their cars in Automobilista 2. The game offers a range of tuning options to adjust the performance of the cars to suit different racing conditions.Is Automobilista 2 suitable for beginners?
Automobilista 2 offers a range of difficulty settings and assists that make it suitable for beginners. Players can adjust the settings to match their skill level and gradually increase the difficulty as they improve.More from Games & Platforms
F1 Sim Racing Guide
F1 sim racing guide: compare F1 24, iRacing, RSS and AMS2, choose the right wheel and load-cell brake, and master braking, ERS and tire strategy.…
Assetto Corsa Ultimate Guide
Assetto Corsa ultimate guide: the best mods (Content Manager, CSP, SOL, Pure), free cars and tracks, online racing, performance tuning, and AC vs ACC …
iRacing Complete Guide
IRacing complete guide: how the online racing sim works, real pricing, iRating vs Safety Rating, the Rookie path, and whether iRacing is worth the cos…